Video Editing Workflow for Tutorial Creators: Complete Guide
Streamline your video editing process with our comprehensive workflow guide. Learn professional techniques to edit tutorials faster without sacrificing quality.
Video Editing Workflow for Tutorial Creators: Complete Guide
Editing can make or break your tutorial videos. A well-edited tutorial keeps viewers engaged, while a poorly edited one loses them in seconds. After editing hundreds of tutorials and training dozens of content creators, I've developed a workflow that balances quality with efficiency.
This guide will help you establish a professional editing workflow that saves time while producing high-quality results.
The Complete Editing Workflow
Phase 1: Pre-Editing Setup (Before You Record)
Organization is Key
Create a consistent project structure:
project-name/
├── 01-raw-footage/
├── 02-audio/
├── 03-assets/
│   ├── images/
│   ├── logos/
│   └── music/
├── 04-project-files/
└── 05-exports/
Naming Conventions
Use descriptive file names:
2025-01-21_intro-tutorial_v1.mp4screencapture_main-demo_take2.mp4audio_narration_final.wav
Why This Matters:
- Find files instantly
- Avoid version confusion
- Collaborate easily with team members
Phase 2: Import & Organization
Step 1: Create New Project
Set up your project correctly from the start:
Adobe Premiere Pro:
- Sequence Settings: 1920x1080, 30fps
- Audio: 48kHz, 24-bit
- Codec: H.264 for previews
Final Cut Pro:
- Library: Custom location (not default)
- Event: Organized by date or topic
- Project: Match source footage settings
DaVinci Resolve:
- Frame Rate: 30fps
- Resolution: 1080p HD
- Color Space: Rec.709
Step 2: Import and Label
Create bins/folders for:
- Raw screen recordings
- Audio files (narration, music, SFX)
- Graphics and overlays
- B-roll footage (if any)
Color Code Your Clips:
- 🟢 Green: Good takes, approved
- 🟡 Yellow: Needs review
- 🔴 Red: Mistakes, to be deleted
- 🔵 Blue: B-roll or supplementary
Phase 3: Assembly Edit (The Rough Cut)
Goal: Get all content in timeline in the right order
Step 1: Audio Foundation
Start with audio because:
- Easier to edit (waveforms visible)
- Sets pacing for visuals
- Identifies natural cut points
Technique:
- Place full audio track in timeline
- Remove long pauses (>2 seconds)
- Cut out mistakes and "umms"
- Trim dead air at start/end
Step 2: Sync Video
If recording audio separately:
- Use clap or click at start as sync point
- Most NLEs have auto-sync features
- Verify sync periodically throughout
Step 3: Rough Assembly
- Don't worry about perfection yet
- Keep all potentially useful content
- Mark sections with markers:
- 🔷 Intro
- 🔷 Main content
- 🔷 Conclusion
- 🔷 Call-to-action
Phase 4: Detailed Editing
Now refine your rough cut into a polished video.
Pacing & Timing
Rule of Thumb:
- Intro: Keep under 30 seconds
- Main content: 3-7 minute segments
- Transitions: <1 second
- Outro: 15-30 seconds
Cut Aggressively:
- Remove filler words (um, uh, like)
- Trim pauses to 0.5-1 second max
- Cut redundant explanations
- Delete tangents
Maintain Flow:
Good Pacing:
Concept → Example → Application → Next Concept
    (20s)    (40s)      (30s)        (Transition)

Bad Pacing:
Long explanation → Another long explanation → Rushed example
       (3min)              (2min)                (20s)
Visual Enhancement Techniques
1. Zoom & Pan (Ken Burns Effect)
Use for:
- Emphasizing small UI elements
- Drawing attention to specific areas
- Adding visual interest to static screens
Settings:
- Zoom: 120-150% (not too much!)
- Duration: 1-2 seconds
- Easing: Smooth in/out
2. Callouts & Annotations
Add text overlays for:
- Important URLs or commands
- Key concepts or definitions
- Step numbers in tutorials
- Warnings or tips
Best Practices:
- Use consistent styling
- Keep on screen 3-5 seconds minimum
- Don't cover important UI elements
- High contrast colors (yellow/red on dark bg)
3. B-Roll & Cutaways
Break up screen recording monotony:
- Show end result briefly
- Insert relevant graphics
- Add quick "before/after" comparisons
- Include related screenshots
Audio Editing Essentials
Levels & Balance:
- Narration: -12dB to -6dB (peaks)
- Music: -25dB to -18dB (background)
- Sound effects: -15dB to -10dB
Equalization (EQ):
- Cut low frequencies (<80Hz) - removes rumble
- Boost presence (2-5kHz) - clarity
- Reduce harsh frequencies (6-8kHz) if needed
Compression:
- Ratio: 3:1 to 4:1
- Threshold: -20dB to -15dB
- Attack: 5-10ms
- Release: 50-100ms
Noise Reduction:
- Use spectral de-noise for constant noise (AC hum)
- Manual clip gain for inconsistent levels
- De-esser for harsh "S" sounds
Phase 5: Polish & Effects
Intro Sequence (5-10 seconds)
Elements to include:
- Channel/brand logo
- Video title
- Quick teaser of what's coming
- Upbeat music sting
Transitions
Use sparingly:
- Cross dissolve: Between major sections
- Cut: Between related topics (most common)
- Wipe/zoom: Only for time jumps
Avoid:
- Star wipes, page turns, etc. (too cheesy)
- Long transitions (>1 second)
- Different transitions throughout
Graphics & Lower Thirds
Professional touch:
- Your name/role at intro
- URLs when mentioned
- Key points as text overlay
- Social media handles at outro
Color Grading
Keep it simple for tutorials:
- Ensure consistent white balance
- Slight contrast boost (+10-15%)
- Gentle saturation increase (+5-10%)
- Maintain readability above all
Phase 6: Review & Refinement
First Review Pass: Technical
Check for:
- ✅ Audio sync throughout
- ✅ No visual glitches
- ✅ Consistent volume levels
- ✅ Smooth transitions
- ✅ Correct spelling in text
Second Review Pass: Content
Ask yourself:
- Does the opening hook viewers?
- Is the pacing consistent?
- Are all steps clear?
- Is anything redundant?
- Does it end with clear CTA?
Third Review Pass: Fresh Eyes
- Watch after a break (next day ideal)
- Pretend you're the target audience
- Note anything confusing
- Check overall flow
Pro Tip: Watch at 1.5x speed to catch pacing issues
Phase 7: Export & Delivery
Export Settings by Platform
YouTube:
Format: MP4 (H.264)
Resolution: 1920x1080
Frame Rate: 30fps
Bitrate: 8-12 Mbps (VBR, 2-pass)
Audio: AAC, 192 kbps, 48kHz
Vimeo:
Format: MP4 (H.264)
Resolution: 1920x1080 or higher
Frame Rate: Match source
Bitrate: 10-20 Mbps
Audio: AAC, 256 kbps, 48kHz
Website/Self-Hosted:
Primary: WebM (VP9)
Fallback: MP4 (H.264)
Create multiple qualities:
  - 1080p (high)
  - 720p (medium)
  - 480p (low)
File Naming for Export:
title_version_resolution_platform.ext

Examples:
- intro-tutorial_v3_1080p_youtube.mp4
- demo-video_final_720p_web.webm
Time-Saving Editing Techniques
1. Use Keyboard Shortcuts
Essential Shortcuts (Most NLEs):
Space- Play/PauseI- Mark In pointO- Mark Out pointC- Razor/Cut toolV- Selection toolCmd/Ctrl + K- Cut at playhead
Create Custom Shortcuts: Map frequently used effects or commands to single keys
2. Template Everything
Create reusable templates for:
- Intro sequences
- Outro sequences
- Lower thirds
- Transition effects
- Title cards
Save 10-15 minutes per video by using templates
3. Proxy Workflow
For 4K or high-resolution footage:
- Create proxies (720p or 480p versions)
- Edit with proxies (faster playback)
- Auto-replace with full res on export
Improves editing speed by 3-5x on older computers
4. Batch Processing
Process multiple clips simultaneously:
- Color correction
- Audio normalization
- Noise reduction
- Format conversion
5. Strategic Pre-Recording
Eliminate editing issues before they happen:
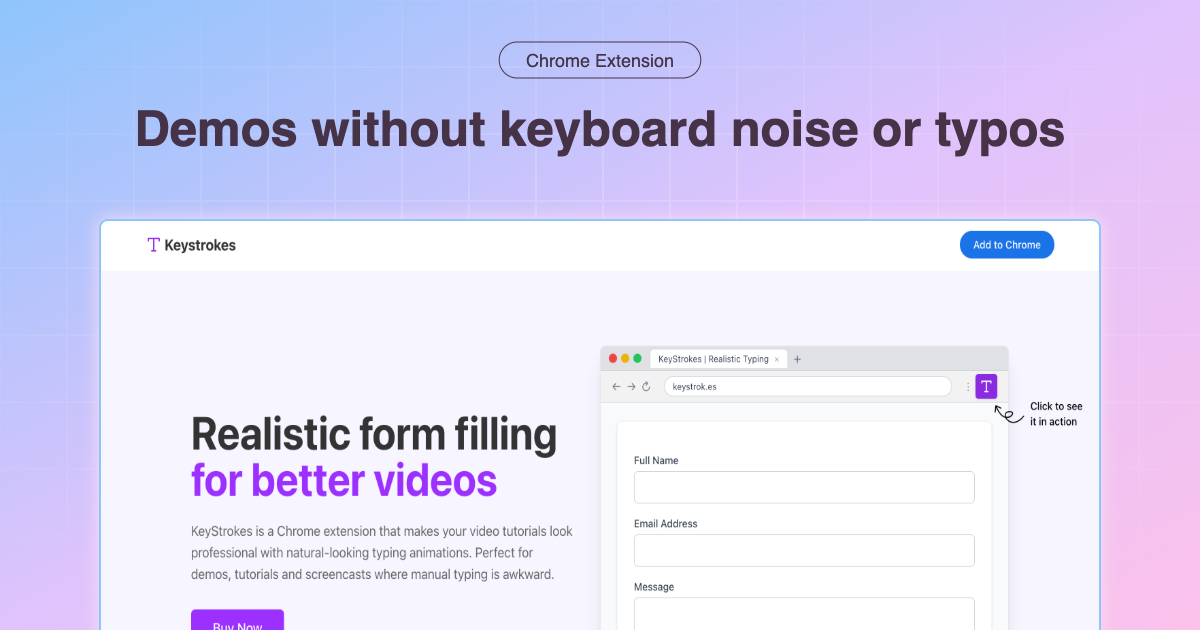
- Use KeyStrokes for perfect form filling (no typos to fix)
- Record in segments (easier to edit)
- Leave 3-second pauses for cut points
- Count down before starting (clean edit point)
Common Editing Mistakes to Avoid
1. Over-Editing
Signs you're over-editing:
- Every cut has a transition
- Multiple effects stacked
- Constant zooming/panning
- Too many callouts/graphics
Solution: Keep it clean. Let content shine.
2. Inconsistent Styling
Maintain consistency in:
- Font choices (max 2 fonts)
- Color palette (stick to brand colors)
- Transition types
- Graphic styles
3. Poor Audio Mixing
Common mistakes:
- Music too loud (battles narration)
- Inconsistent voice levels
- Unprocessed room echo
- Harsh "S" sounds (sibilance)
4. Ignoring Platform Requirements
Each platform has specifications:
- YouTube: Max 128GB, 12 hours
- Vimeo: Varies by plan
- Twitter: Max 2min 20sec, 512MB
- Instagram: Max 60 seconds
Plan your edit for the target platform
Advanced Workflows
Multi-Cam Editing
For screen + webcam recordings:
- Sync all cameras
- Use multi-cam clip feature
- Switch between angles dynamically
- Adjust picture-in-picture size/position
Chapter Markers
Add for longer videos (>10 minutes):
- Mark major sections
- Export chapter data
- Upload to YouTube/Vimeo
- Improves viewer navigation
Accessibility Features
Make content accessible:
- Add closed captions (auto-generate, then edit)
- Include transcript in description
- Use high-contrast text
- Describe visual elements verbally
Editing Efficiency Metrics
Track your improvement:
Beginner:
- Raw footage: 30 minutes
- Editing time: 3-4 hours
- Ratio: 6-8:1
Intermediate:
- Raw footage: 30 minutes
- Editing time: 1.5-2 hours
- Ratio: 3-4:1
Advanced:
- Raw footage: 30 minutes
- Editing time: 45-60 minutes
- Ratio: 1.5-2:1
Goal: Get to 2:1 ratio (2 hours editing for 1 hour of content)
Tools & Software Recommendations
Editing Software
Professional:
- Adobe Premiere Pro ($20.99/mo) - Industry standard
- Final Cut Pro ($299 one-time) - Mac only, fast
- DaVinci Resolve Studio ($295 one-time) - Color + editing
Intermediate:
- DaVinci Resolve Free - Full-featured, free
- Camtasia ($249) - Built for screen recordings
- ScreenFlow (Mac, $169) - Simple but powerful
Beginner:
- iMovie (Free, Mac) - Simple, built-in
- Windows Video Editor (Free, Windows) - Basic but functional
- Kapwing (Browser-based) - No installation needed
Plugins & Extensions
Must-Have Plugins:
- Auto-Reframe - Crop for different aspect ratios
- Noise Reduction - Clean audio (iZotope RX, Krisp)
- Auto-Duck - Lower music when talking
- Closed Caption - Auto-generate subtitles
Conclusion
A solid editing workflow is the difference between spending all day editing and getting it done efficiently. Remember:
- Organize before you edit - save hours of searching
- Audio first - it's 50% of the experience
- Edit in passes - assembly, detail, polish
- Use templates - don't reinvent the wheel
- Automate repetitive tasks - like form filling with KeyStrokes
The best way to improve is to edit consistently. Each video you edit will be faster and better than the last.
Streamline Your Entire Production
Reduce editing time by eliminating typing mistakes during recording. KeyStrokes automates form filling so you can focus on content, not fixing typos in post-production.
Related Guides:
- Screen Recording Tips & Tricks
- Professional Video Tutorial Creation
- SaaS Product Demo Best Practices
Questions about video editing? Reach out at hello@keystrok.es